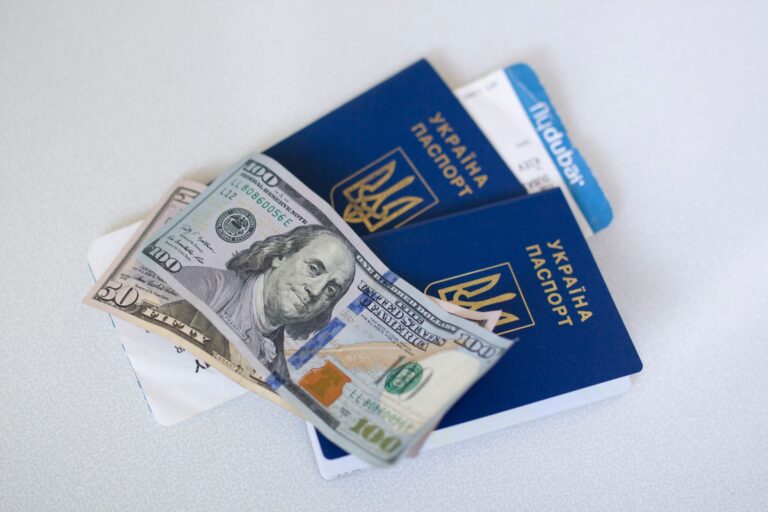

A few small slips can snowball into missed flights, extra fees, and a rough arrival for new travelers. A passport that expires too soon, a checked bag with your charger inside, or a 45-minute connection can turn a simple trip into a scramble.
This checklist helps with your first flight abroad, your first self-transfer, or your first long-haul trip with more moving parts than you expected. You’ll move through documents, packing, airport timing, money, phone setup, and the first night on the ground.
Start With the Mistakes That Cost Time and Money
Missed boarding, a bad transfer, and a full itinerary can drain a trip before you leave the airport. A single late arrival can trigger rebooking fees, lost reservations, and a first day that feels out of control.
Late Airport Arrival Sets Off a Chain Reaction
Security lines, bag drop, and boarding all run on clocks that do not bend for your schedule. TSA says unprepared screening is a common source of delay, and airport rush hour can turn a 15-minute cushion into a sprint with no margin.
For an international flight, many travelers need 2 to 3 hours at the airport, then extra time for traffic and parking. That is not padding for its own sake; it gives you room for a long bag-drop line, a secondary ID check, or a gate change across the terminal.
Overpacked Plans Create Self-Inflicted Stress
A schedule with six cities in eight days sounds efficient on paper and exhausting in real life. Jet lag slows judgment, missed trains happen, and one delayed transfer can knock out the rest of the day.
Travel + Leisure often frames a relaxed arrival as part of a better trip for a reason: the first 24 hours set the rhythm. Leave gaps for food, sleep, and transit hiccups, and you avoid the domino effect that follows a rushed start.
A First Trip Needs Breathing Room
That pattern sits behind many first-time travel mistakes to avoid. The biggest loss is not one wrong decision; it is the way one rushed choice forces the next five.
Once that timing picture is clear, the paperwork problem becomes the next place where a small miss can stop the trip cold.
When timing is tight, a missing stamp or expired document can unravel the whole itinerary.
Get Passport, Visa, and Paperwork Right Before You Leave
A valid passport alone is not always enough. Many countries want at least six months of validity past your stay, and the airline can refuse boarding before border officials ever see you.
Check Validity and Blank Pages
The U.S. Department of State tells you to review passport validity well before departure, not at the airport. Some destinations also want blank pages for entry stamps, so a passport with only one open page can still cause trouble.
Routine passport renewal can take weeks, and extra proof of citizenship can slow the process even more. That delay matters because travel plans often run on deposit dates, not document dates.
Confirm Visa and Entry Rules Early
Visa-free does not mean paper-free. Many trips still need an e-visa, an ETA-style pre-clearance, or transit permission for a layover country, and those rules can depend on nationality as much as destination.
CBP and IATA both stress route-specific checks because the route itself changes the paperwork. A traveler flying through one country on the way to another may need a transit visa even with a short connection.
Carry Copies and Store Key Numbers Separately
Pack a paper copy of your passport, your card hotlines, and your hotel confirmation in a separate place from the originals. Keep a digital backup in email and offline storage on your phone, not only in the cloud.
STEP, the Smart Traveler Enrollment Program from the State Department, adds another layer. It lets U.S. travelers receive alerts and gives consular staff a faster way to reach you in a disruption.
Make the copy plan simple: one scan in email, one in offline storage, one paper copy in a different bag. That split matters more than fancy organization because theft, loss, and battery failure do not happen one at a time.
With entry documents sorted, you can shift from border risk to the bag that stays with you through the whole trip.
Once entry rules are covered, the focus shifts to what you can keep close at hand.
Build a Carry-On That Covers the Essentials

Keep the Irreplaceable With You
Put medication, prescriptions, ID, passport, charger, contact lenses, and one change of clothes in your carry-on luggage. A delayed checked bag can ruin the first night, but a carry-on with the essentials keeps the trip moving.
TSA carry-on rules matter here because liquids, gels, and certain tools need screening-friendly packing. The goal is not to stuff your bag; it is to keep the items that would derail your day out of checked baggage.
Protect Health and Medication Access
CDC Traveler’s Health advises carrying prescription medicines in original containers and packing a small health kit. That matters because replacement fills abroad can be slow, and some medicines need a doctor note or a specific label to pass inspection without trouble.
There is also a plain biological reason to keep medicine close: disrupted sleep, dehydration, and altitude can make minor symptoms feel bigger on day one. A first-trip medical gap can become a bigger problem than the flight itself.
Use a Carry-On for the First 24 Hours
Think of your carry-on as your one-night survival kit. Toothbrush, charger, a T-shirt, socks, basic toiletries, and any daily medication belong there before anything else.
When your checked bag goes missing, the first day still works. That small shift keeps a baggage delay from turning into a trip-wide problem, and it feeds directly into the next mistake: hauling too much in the rest of your luggage.
That setup prevents one delay from snowballing, while also nudging you toward a lighter overall load.
Pack Light Enough to Stay Flexible
Overpacking is one of the most common travel mistakes for first-time travelers because you pack for fear, not for the trip. A bag that feels safe at home becomes heavy on stairs, in train stations, and in overhead bins.
| Packing choice | What it does | Why it matters |
|---|---|---|
| Two versatile layers | Works across mild shifts in weather | Keeps weight down and cuts outfit decisions |
| Extra shoes | Adds bulk fast | Usually costs more space than value |
| One jacket | Covers rain or chill | Handles transit, dinner, and airport AC |
| Special-occasion pieces | Looks nice in photos | Can sit unused for the whole trip |
Check Weight and Size Before You Leave
At home, weigh your bags and review the airline’s size and fee rules before heading to the airport. A bag that fits your front door can still miss the airline limit by a few inches or a few pounds.
That matters because a gate check or extra baggage fee can erase the savings from a cheap fare. A carry-on that slips under the limit also gives you faster airport movement and less lifting at every stop.
Pack for Weather, Dress Codes, and Walking
Clothes should match the destination climate, the local customs, and the amount of walking you’ll do. A city break in shoulder season calls for layers, while a beach stay needs light fabric that dries fast.
What you wear can affect security too. Shoes that slip off fast and clothes without metal clutter save time at screening, and that is one of the easiest airport mistakes before flying to fix.
Choose Items That Work in More Than One Setting
Neutral tops, one pair of shoes that can handle long walks, and a jacket that works day and night beat a suitcase full of single-use outfits.
That flexible packing approach also keeps room for purchases abroad, which matters once you start dealing with flights, connections, and airport rules.
Less weight means more flexibility, especially when schedules, gate changes, and baggage limits start competing for attention.
Plan for Flights, Connections, and Airport Rules
A good flight plan starts with buffer time, not optimism. Traffic, long security lines, and boarding that begins before the posted departure time can all cut your margin fast.
- Build in traffic time Leave more room than your map app suggests, especially during rush hour or holiday periods.
- Check in ahead Online check-in can save time and expose seat or document issues before you reach the airport.
- Study the gate rules Boarding can begin 30 to 45 minutes before departure, so do not wander far from the gate.
- Protect tight connections A self-transfer or 45-minute layover gives you no cushion for immigration, terminal changes, or bag re-checks.
- Know your baggage policy Fare rules differ by airline, and a basic ticket can exclude checked bags, seat choice, or changes.
Tight Connections Are Expensive Races
A self-transfer sounds manageable until you add a late arrival, a terminal change, and a bag-drop cutoff. That is how a short layover turns into a same-day fare change, an overnight stay, or a lost second flight.
FAA traveler guidance and CBP entry rules both point to the same idea: give border control and airport operations more time than you think they need. Airports do not run on your clock.
Airport Rules Can Cost More Than You Expect
TSA carry-on screening rules, airline baggage limits, and customs declaration limits all live in different places. A traveler who checks a knife, a liquid over the limit, or an undeclared item can face delays before boarding or trouble at arrival.
CBP also reminds travelers to know what needs declaration on re-entry to the United States. That is not paperwork for the sake of paperwork; it is part of moving through the border without a stop.
A Short Buffer Beats a Long Apology
A missed flight can cost far more than an extra hour at the airport. That hour is the cheapest insurance against traffic, security, and the small chaos that comes with first-time travel mistakes to avoid.
Once the flight plan is set, the next weak spot is health, money, and getting connected after landing.
After the route is mapped out, practical concerns like prescriptions, cash, and signal access deserve equal urgency.
Handle Health, Money, and Connectivity Early
Prescription access, card access, and phone access are the three things that turn a smooth arrival into a scramble when they fail. Set them up before departure, and your first hour on the ground feels normal instead of improvised.
Prepare Health Needs Before the Flight
CDC Traveler’s Health recommends reviewing destination vaccines, food and water safety, insect-borne disease risk, and any prescription limits before travel. That matters because health problems abroad can start with simple things like bad water, skipped medicine, or a sleep-deprived arrival.
Pack medication labels, a basic pain reliever, motion-sickness tablets, and any doctor notes you need. Original containers help at customs and also make your own bag easier to sort under stress.
Buy Insurance That Matches the Trip
Travel insurance can help with medical bills, trip interruption, and baggage trouble. It matters most on trips where a canceled flight, a broken ankle, or a delayed bag would cost far more than the policy.
Foreign medical care can move fast and bill fast. A small policy can be the difference between a handled delay and a financial mess that follows you home.
Set Up Money in More Than One Form
Tell your bank you are traveling, carry a credit card with low foreign transaction fees, and keep a second card in a separate pocket or pouch. CFPB guidance points to card fraud, foreign fees, and ATM markups as common ways travelers lose money.
Do not rely on one debit card. A card can fail at a station kiosk, get blocked by fraud controls, or get skimmed at an ATM, and then your whole plan slows down.
Load Connectivity Before Landing
Roaming, eSIM, and local SIM card options all solve the same problem in different ways: getting you online fast enough to find transport and contact your stay. Offline maps in Google Maps matter too, because weak signal at the airport does not care about your plans.
A local SIM is useful for long stays or heavy navigation. Roaming can be simpler for short trips, while an eSIM gives you setup without hunting for a kiosk after customs.
That prep reduces the two most frustrating arrival problems: no way to pay and no way to get where you are going. From there, the final stretch is about fitting in, staying aware, and not packing the day too full.
Because getting there is only half the job, the real adjustment begins with local habits and a manageable pace.
Arrive Ready for Local Culture, Safety, and a Realistic Pace
Most first-time travelers trip over local customs long before they run into anything dramatic. A tip amount, a dress expectation, or a dinner hour that runs later than home can feel small, yet those details shape how smooth the first day feels.
Learn Dress, Tipping, and Daily Rhythm
Research local customs, tipping culture, and weather before you pack. A light scarf, closed-toe shoes for certain sites, or cash for service tips can keep you from standing out in the wrong way.
Some cities expect late meals and a slower pace; others run on strict schedules and early closures. That difference matters because your lunch, museum visit, and transit plan all depend on local hours, not your habits at home.
Stay Alert in Transit Hubs and Tourist Zones
Keep your passport, cards, and phone in separate places. That split makes theft less damaging and gives you a backup path if a wallet, bag, or pocket gets lost in a crowded station.
Travel scams tend to work best when you are tired, distracted, or trying to read signs under pressure. A driver without a meter, an unmarked taxi, or a helpful stranger who wants to hold your bag can all create problems fast.
Leave the First Day Light
Jet lag can flatten your judgment, and altitude or heat can make a packed schedule feel twice as hard. A walk, a meal, a shower, and an early night beat a full slate of tours and timed tickets.
That is where the last set of first-time travel mistakes to avoid shows up: not the big dramatic errors, but the tiny habits that make arrival day harder than it has to be.
Those small habits are the difference between a smooth arrival and avoidable friction.
What to Remember
The safest first trip starts with slack in the schedule, a clean document check, and a carry-on that covers the first day. Once you protect those basics, the rest of the trip gets easier to handle. That is the difference between reacting to problems and moving through them with a plan.
FAQ
What are the most common mistakes first-time travelers make?
The biggest misses are passport or visa trouble, overpacking, tight flight connections, and arriving at the airport with no buffer. Money setup, phone access, and a packed itinerary also cause trouble fast because each one gets harder to fix once you are already on the move.
What should you not pack in your checked bag when traveling?
Never put medication, passport copies, chargers, valuables, or anything you need on day one in checked baggage. Bags get delayed, misrouted, or damaged, and that turns a simple arrival into a problem you cannot solve right away.
How early should you arrive at the airport for an international flight?
Two to three hours before departure is the safe window for most international flights, and busy hubs can need more. Add extra time for traffic, parking, bag drop, and security, since boarding can start well before the departure time on your ticket.
What travel documents do you need for your first trip abroad?
At minimum, you need a valid passport, and many destinations also need a visa, e-visa, or transit clearance. Keep copies of your passport, bookings, insurance, and emergency numbers in a separate place so you still have access if one bag goes missing.
Should you get a SIM card or use roaming when you land?
Roaming works well for short trips and simple phone use, while a local SIM or eSIM fits longer stays and heavier map use. Offline maps give you backup either way, which matters the moment airport signal drops or your phone battery runs low.
What is the most forgotten item when traveling?
Chargers and medication top the list, followed by adapters, passport copies, and the one extra layer you wanted in the airport. A carry-on checklist solves most of that because it forces you to pack the items that matter in the first 24 hours.